Supports under battery rack
Reinforce Your Trailer’s Battery Rack To Carry More Weight
In our last post, we looked at the cracked travel trailer frame I discovered while working on the A-frame of my RV. The reason I was getting up close and personal with my trailer’s frame was that I was designing a system to help carry the load of a heavier generator behind my LP bottles.
For years I have carried a 1,000-watt generator primarily to keep my house batteries charged. With the advent of the Easy Start and a planned summer trip to a hotter climate, I am in the process of upgrading from the 1,000-watt Honda generator to a 2,200 to power the RV’s air conditioner.
I carry my generator on a small platform table that spans the two batteries on the front of the trailer, with the weight of the generator being held by the battery rack. Since a weld on the battery rack previously failed while carrying the 1,000-watt generator, I was designing some additional support for the battery rack, as having the rack fail in transit and dropping my new generator on the freeway going 60 MPH down the road is not an adventure in RVing I am anxious to experience.
While I could reinforce the existing battery rack/welds, my overhead welding skills lack perfection, and as I have pointed out in an earlier entry, making permanent modifications to an RV can detract from the resale value.
The following is a short recap on the system I designed to carry the extra weight of the larger generator without welding or drilling on the RV’s frame. Others that want to carry a generator or add a third battery might find this useful.
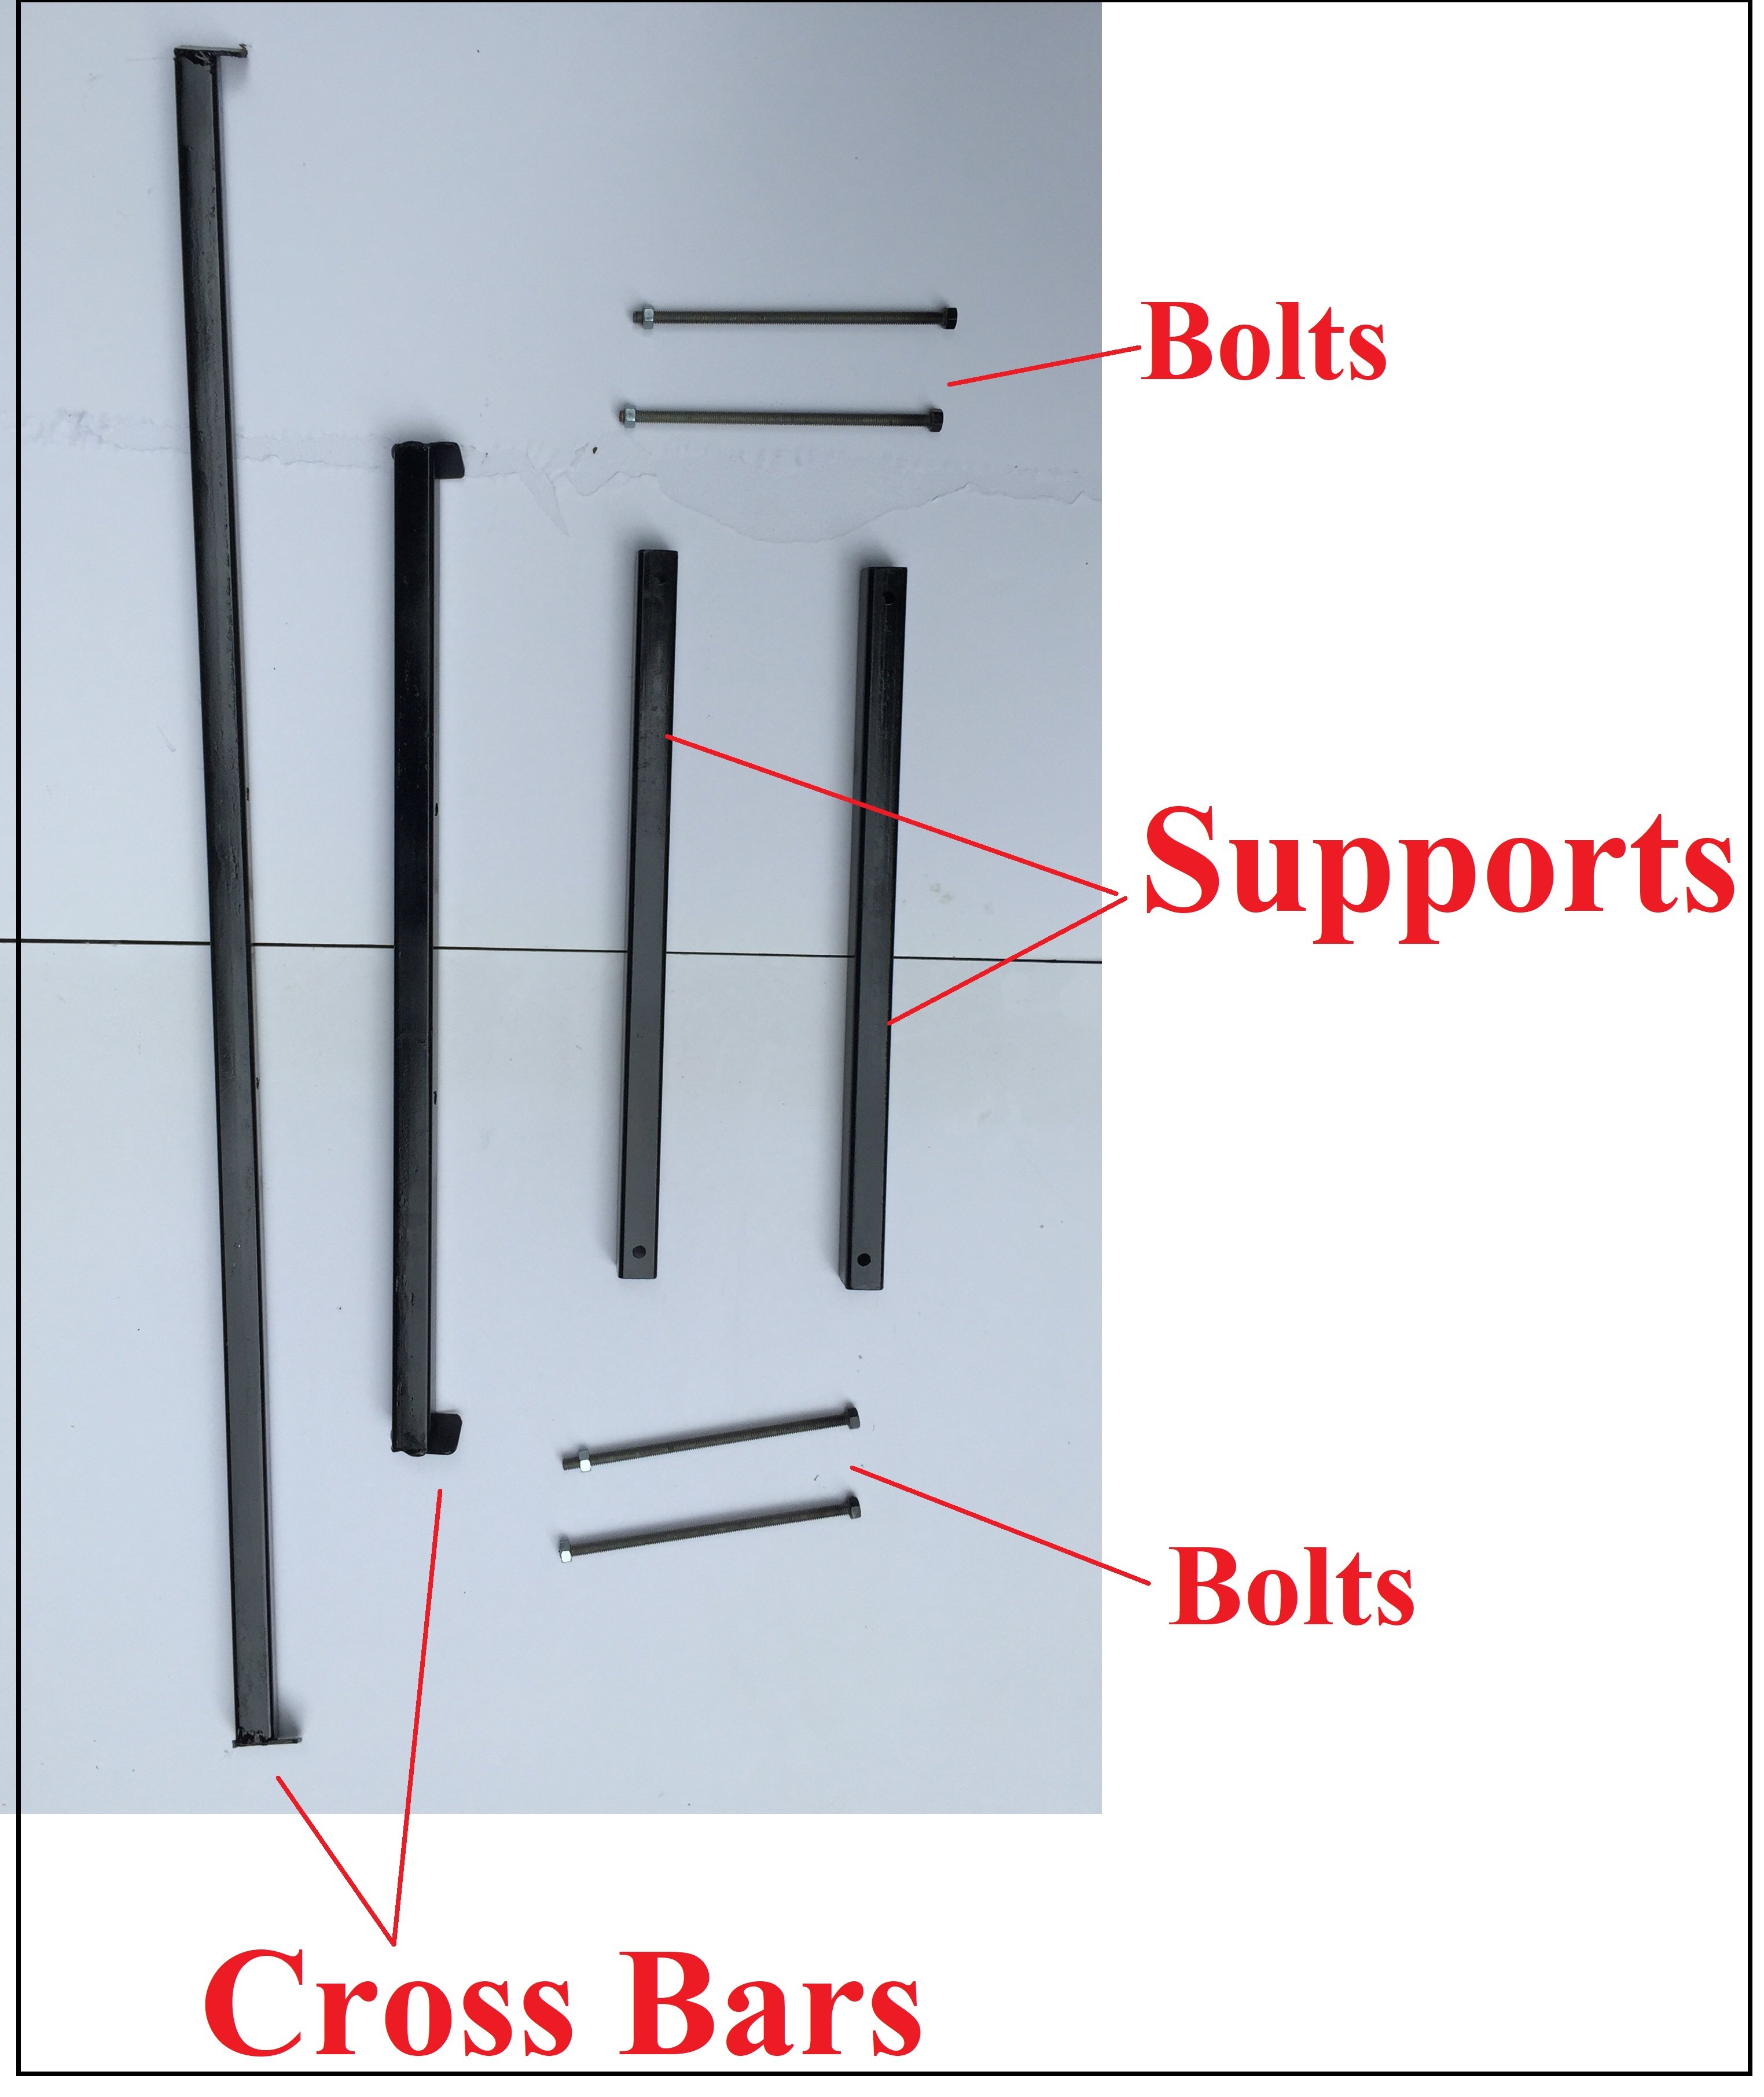
Components used
Add extra support under your battery rack
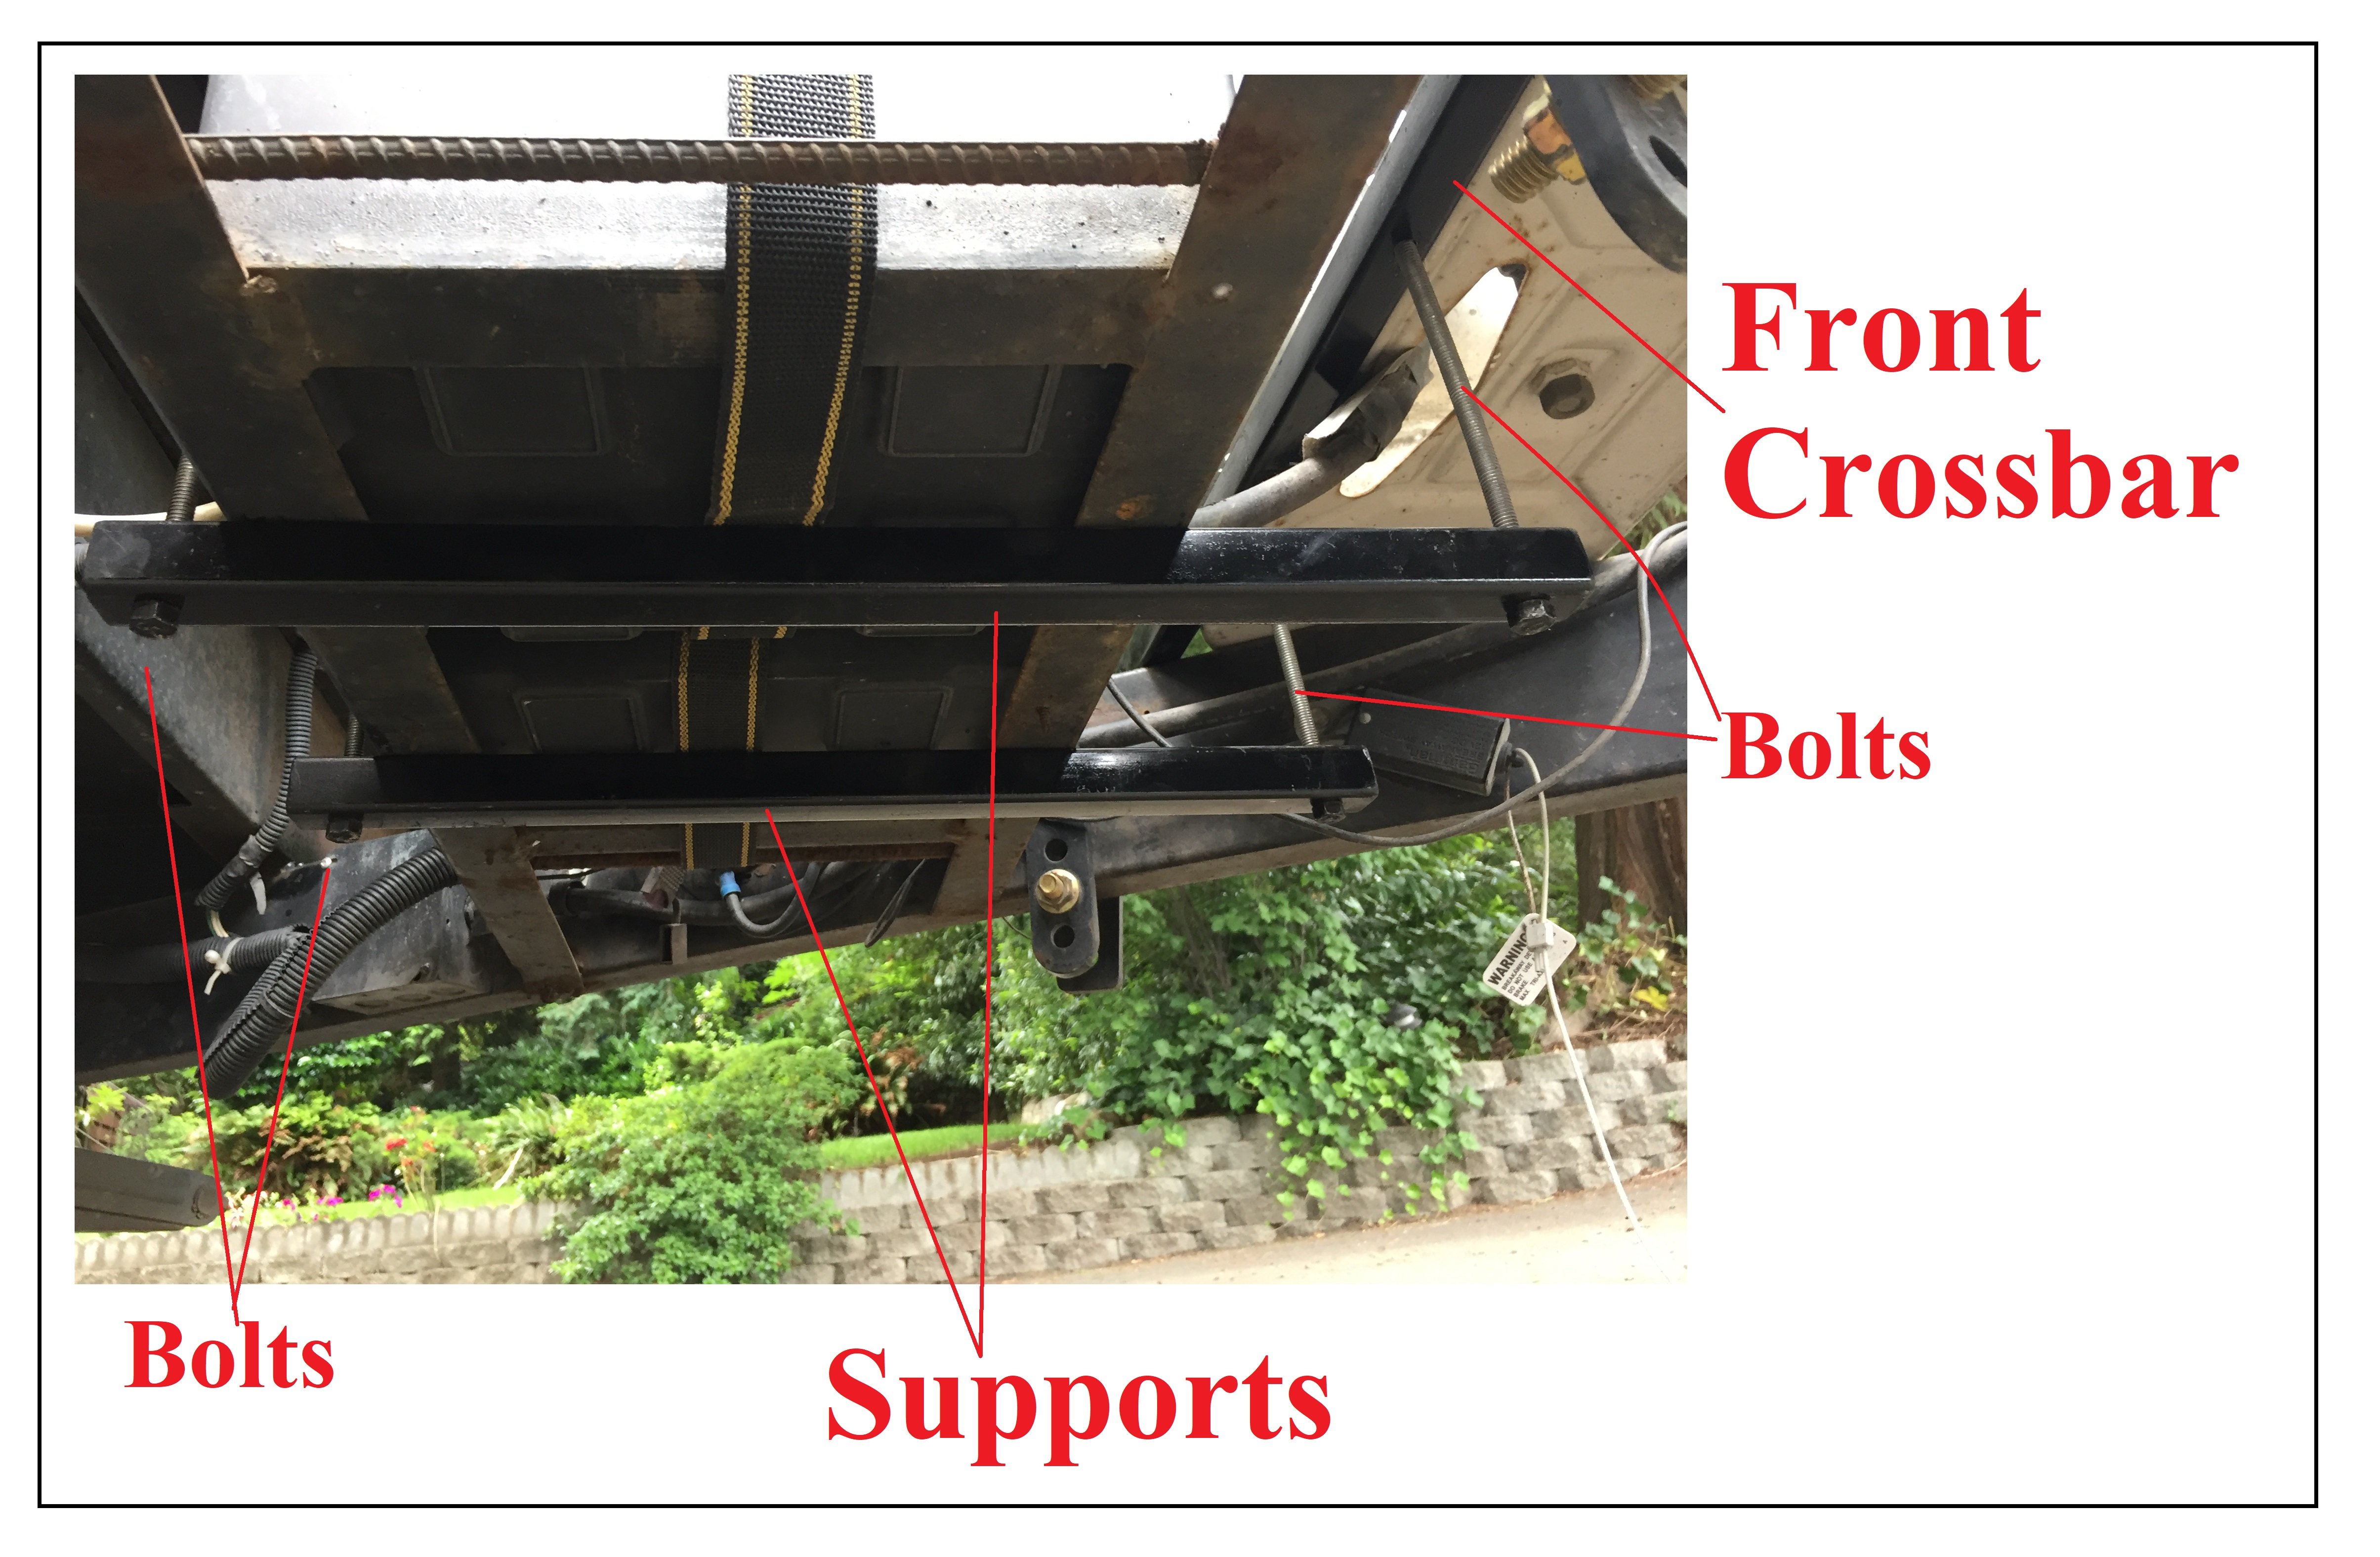
First, I cut two lengths of steel to span the top of the A-frame to carry the weight. (These can be angle or tube. I chose tube as I have a bunch laying around.) I will call these “crossbars.” I cut the ends at an angle to match the trailer’s A-frame.
Second, I needed a way to keep these in place without drilling or welding. I welded down turned ears on the ends of the crossbars to keep them from moving side to side or sliding back.
One crossbar I mounted immediately behind the LP rack and the other behind the battery boxes. Since the A-frame is tapered, the crossbars with the ears mounted on them cannot slide back on the A-frame, and forward motion is blocked by the LP rack and battery boxes.
I then cut/drilled two identical lengths of steel to run under the battery rack (front to rear—90° to the crossbars above) to provide the added support to carry the new generator. I will call these “supports.” Next, I drilled holes in the crossbars that would accept the bolts from the supports below.

Looking from above
Finally, just bolt the supports to the crossbars and tighten to sandwich the whole thing in place. I created the bolts by brazing nuts on 8” lengths of all thread. I used Loctite threadlocker and lock washers to make sure nothing comes loose.
This new reinforcement system can easily carry the extra weight of my new generator, while also providing extra strength to the existing battery rack, too.
Driving down the road without having to worry about losing my batteries and generator—just another adventure in RVing!

great step by step explaination, how a finished product pic
Where is the generator? Looks like just battery box reinforced?
Any pictures with generator mounted?
Another great idea Dave… thanks for showing us the pictures!!!
The extra weight of everything that was not origional to the trailer needs to be added up, and then added to the tongue weight of the trailer so that you can tell if you have exceeded the hitch weight rating on your tow vehicle, AND not exceeding your trailers’ GAWR and GVWR numbers, or troubles you don’t want will be somewhere down the road.