Basic Campsite Set Up
If you’re reading this, you probably don’t need an excuse to do more camping. However, one of the best ways to discover how to set up a campsite is to regularly camp. The more you do, the more you’ll find what works and what doesn’t for your camping style. Today, we want to share with you some of our best tips on how to set up a campsite for an epic camping trip!
How to Set Up a Campsite
No matter how long you plan to camp in your RV, there are a few things that you’ll want to do no matter what. Let’s check out these essential items!
Leveling Your RV
An essential component of knowing how to set up a campsite is leveling your RV. It’s incredibly important for your comfort and the efficiency of some of your RV’s appliances. For example, an RV refrigerator that runs on propane must be level to be efficient. If your RV is not level, you may notice the fridge won’t stay cool. You’ll not only be uncomfortable, but you could also be risking a refrigerator full of spoiling food.
Level your RV as much as possible before unhitching. Leveling might require adjusting your RV’s position in your campsite. We’re often shocked at the difference moving our RV a few feet in any direction can make. A level RV means your leveling system (if applicable) will have less work to do.
Whether you’re a total newbie, or an experienced camper, there are a few essential items you may need.
Accessories You May Need to Level Your RV
The LevelMatePRO+ by LogicBlue is a tremendous resource that can help you get your RV as level as possible without having to get out of your car. This invaluable tool mounts in an inconspicuous location in the RV and communicates the RV’s level status to an app on the user’s cell phone. This technology allows you to move your RV around the campsite to find the most level and convenient parking spot for your rig.
The Andersen camper leveler system makes leveling your RV incredibly easy. All you’ll need to do is place the crescent-shaped leveling blocks under the lower side of your RV’s tires and drive onto them. Using these blocks can raise your RV’s low side a maximum of four inches. Combining the Andersen blocks with the LevelMatePro, your RV will be level in no time!
The more you extend your RV’s leveling jacks, the more bounce and movement you’ll have in your RV. Limiting the amount of extension on your leveling jacks helps resolve this problem. You’ll get the best results using wooden blocks or lighter products like Camco’s Heavy Duty Leveling Blocks. Placing these under the leveling jacks helps limit the amount of jack extension required.
Chocking Your Wheels
Before disconnecting your RV from your tow vehicle, chock your wheels. The last thing you want to see during your epic camping trip is your home on wheels rolling away. Some of these RVs weigh well over 20,000+ pounds; you won’t be stopping them once they start moving.
Accessories You May Need
Have a couple of sets of solid rubbery heavy-duty chocks on hand. Placing these chocks on the front and back of your wheels prevents movement, especially when unhitching. Whether on a hill or flat campsite, wedge these in place to avoid any potential issues.
Many RVers choose to use the X-Chock Wheel Stabilizer. These wheel chocks rest between the wheels on dual axle RVs to prevent movement. A ratchet tightens the chocks making them snug between the wheels.
Unhooking the Camper (or Tow Vehicle)
After securing your RV, unhitch it from your tow vehicle. This step will vary based on the camper and hitch you’re using. Consult your hitch owner’s manual and familiarize yourself with the process. Take your time to prevent injury or damage.

Hooking Up to Power
All of the fancy appliances in your camper will require power. Your RV may come equipped with a battery or two, but it likely won’t last long. If you’re at a campground, you might have access to a power pedestal for those appliances. Electricity can be dangerous for you and your RV.
Let’s look at a few accessories you’ll need to keep everyone safe while camping.
Accessories You May Need for Power
You may arrive at your campsite and discover that your power pedestal is a different power amperage than your RV. Your 50-amp RV will not be compatible with a 30-amp pedestal, but a dogbone adapter can save the day. This adapter can convert a 30-amp service into a 50-amp plugin. While it won’t magically create an extra 20 amps of service, it will allow you a generous amount of power.
You’ll have to do a bit of power management to avoid tripping the breaker at the pedestal. Proper power management will often mean running only one air conditioner and watching what heavy-use electronics you’re using simultaneously. Coffeemakers, air conditioners, hairdryers, and instant pots are all popular power-hungry items.
Most residential homes have surge protectors. These often protect expensive electronics from lightning strikes or power surges. An RV is essentially an expensive piece of electronic equipment when plugged in. A lightning strike or power surge can quickly do thousands of dollars in damage to an RV.
You can take the next step in protecting your RV’s electrical system by investing in a surge protector and an electrical management system. These systems constantly monitor the electric current going into your RV. It will protect your RV from surges and shut down the system when the voltage decreases to dangerous levels.
Not having enough electrical current sent to appliances can cause just as much damage as having too much. Shutting off the electricity can protect the RV and electronics.
Connecting Fresh Water
If you’re camping somewhere with hookups, your campsite will most likely come with both a power pedestal and a freshwater connection, meaning you can fill your fresh water tanks without using a water pump.You’ll need a few things to make this happen, but it’s not complicated.
Accessories You May Need for Water
The first essential accessory to connect to the freshwater connection is a potable water hose. These hoses are made from materials that are 100% safe for drinking, unlike your standard garden hose. You won’t have to worry about the inside of your hose contaminating your water.
This freshwater hose could connect from the water connection to your RV, but we don’t recommend it. We highly recommend connecting a water filter to your RV first. This setup lets the water travel from the connection, through the potable hose, and then through the filter before entering your RV. Water filters and systems vary in size and cost depending on the level of filtration.
While this may sound like a complete setup, you’re missing a key element–a water pressure regulator. Your RV’s water lines can’t handle high pressure as it may cause damage to fittings and pipes. A water pressure regulator controls higher pressures than your RV’s water system and can be attached before or after the potable hose.
Connecting to Sewer
Water used in your RV goes down one of two tanks. Any water that goes down a drain enters a gray water tank, and anything that goes down the toilet enters a black water tank. You might appreciate the convenience of a sewer connection if your campsite has one.
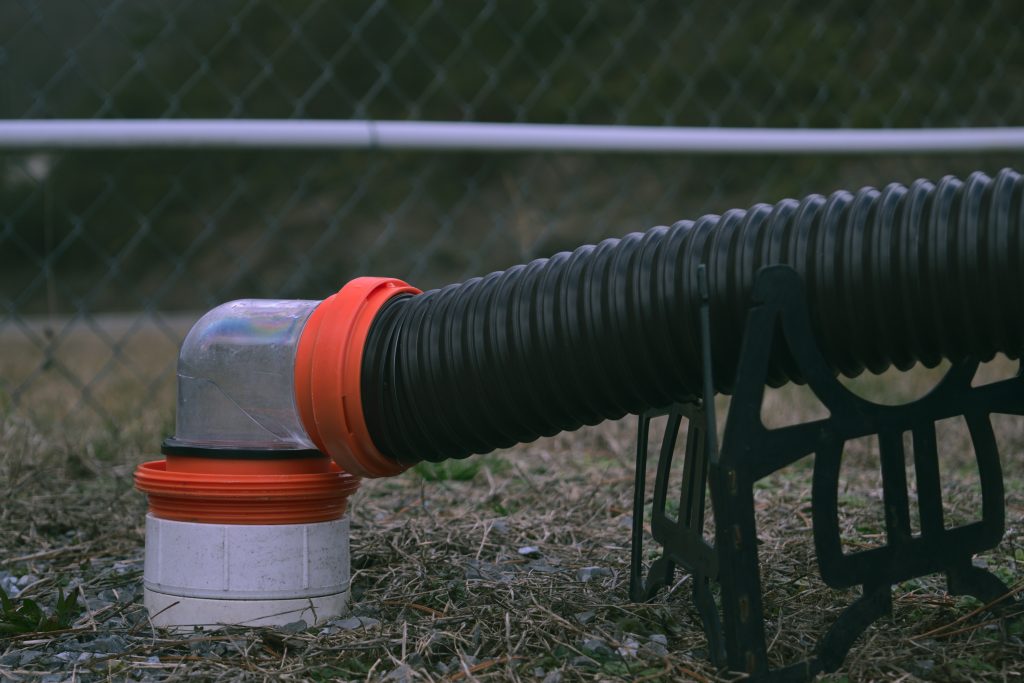
Accessories You May Need for Sewer
An RV sewer hose is one essential accessory you’ll need to set up your campsite. It transfers liquids in your black and gray tanks from your RV into the sewer system. They vary in length and flexibility based on the hose material.
You’ll also want several different adapters. These can be clear elbows or sewer connection adapters. They’ll help make the process of dumping your RV tanks as easy as possible. You can literally see with clear attachments that the tanks are emptying correctly and when they’re empty.
One final beneficial accessory for connecting to a sewer connection is a hose support. This support runs under the sewer hose from the RV to the sewer connection. It helps support the hose to provide optimal flow and keep it off the ground. Some parks and campgrounds might require these supports if the sewer hose stays attached to the sewer connection.
Deploying Your Slides
Once you’ve connected your RV to your outside connections, it’s time to move inside. You don’t want to rush putting out your slide as it can cause extensive damage to your RV and the items inside.
Keep in mind that you’ve just finished towing your rig down the highway. Like on a plane, remember that contents can shift during transit. Let’s look at a few safety tips for putting out your slides.
Safety Tips for Slide Outs
Before hitting any buttons to begin opening slides, look for any signs of shifting or movement in your RV. Look for open cabinets, doors, or other items that could be in the way of your slides opening. An RV’s slide mechanism is powerful and can easily crush cabinets, door frames, and many other items that could have shifted during transit.
Check the distances for slides to open before unhitching to verify that nothing inside or outside blocks your slides. Watch for trees, posts, and anything else that could make contact with your slide as it opens. If there are obstacles, you might need to hitch back up and move the RV.
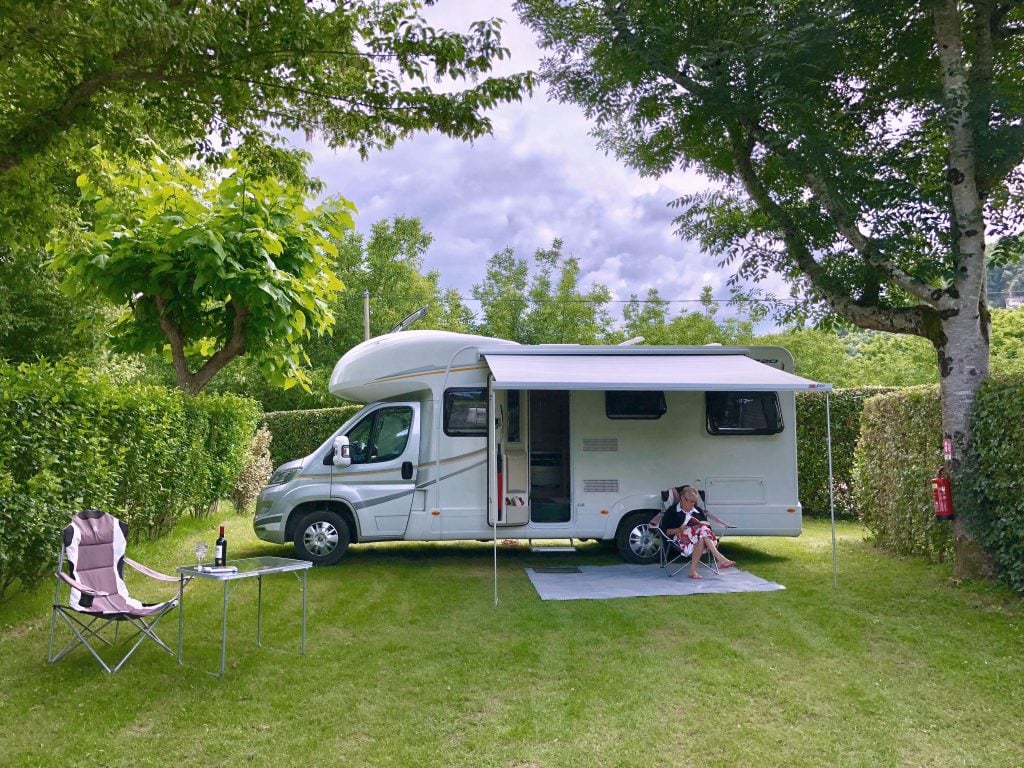
Setting Up Your Outdoor Living Area
When you’re considering how to set up a campsite, don’t forget that a comfortable living environment encourages you to spend more time outside your RV while camping. The more you can do to improve your environment, the better. Let’s look at a few accessories to make your campsite as comfortable as possible.
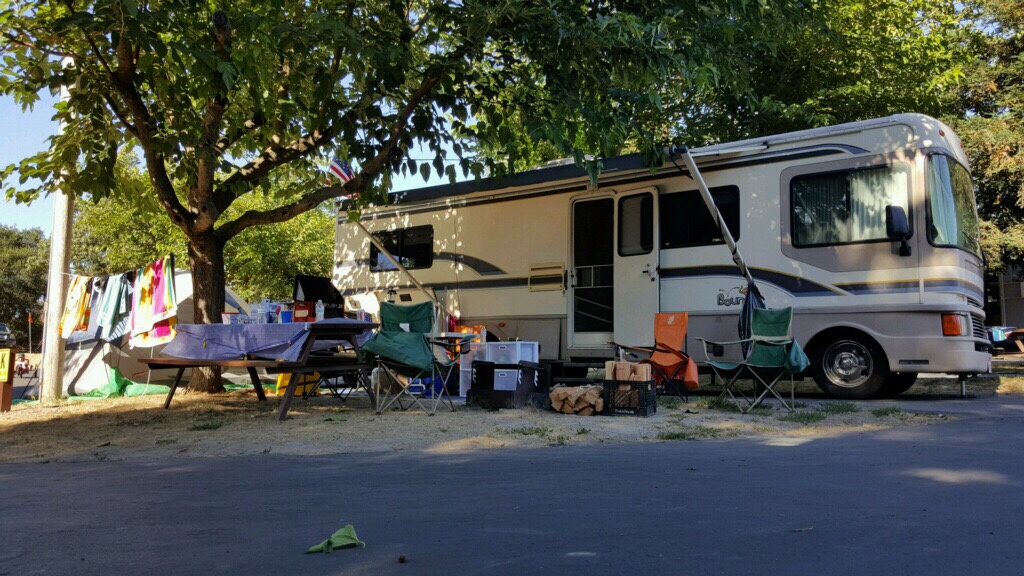
Accessories You May Need
One of the best ways to transform a campsite into a comfortable living area is by placing an outdoor rug in front of your RV. These rugs liven up a campsite and help keep dirt from tracking into your RV. An outdoor rug also helps create a designated lounging space, especially between tight campsites.
You’ll want a place to rest and enjoy the sunsets or a fire. Grab a comfortable camping chair you actually want to sit in. Comfort is essential when you’re spending hours around a fire with those you love.
Strings of lights are one of our favorite ways to transform a campsite into a living space. Consider Edison light bulb strings–there’s something about them hanging over a campsite that creates the perfect atmosphere at the end of the day. They can help you relax and light up your campsite, but not blind you or your neighbors.
Time to Relax!
Ultimately, learning how to set up set up an efficient and comfortable RV campsite for you and your companions is an ever-changing process. You’ll find yourself constantly evaluating your needs, buying new items to test out, and quickly getting rid of the things that don’t work.

Leave a Reply