Is Your Rig Ready For Cold Winter Storage?
If you’re not a fan of cold winters, now’s the time to start planning your snowbird escape. If this isn’t in your plans this winter, here’s how you can ensure your RV is safely tucked away for storage and in top shape come spring.
Water can hurt your RV the most during storage. Both fresh and wastewater systems need the proper attention. If you don’t get the water out, expansion can break pipes and create lots of misery.
Here are some quick tips to refer to time and time again for hassle-free storage and an effortless spring for when you’re ready to hit the road again.
Quick tips for waterless tanks
- Shut down gas and electricity to the water heater (and be sure the tank is cold before the next process).
- Open the drain cock or remove the plug if no drain cock is available. To make the water drain quicker, open the pressure relief valve to break the vacuum. After the tank has drained out, close the drain cock and safety valve.
- While the water heater is draining, locate and open the freshwater tank drain valve. It too should be drained completely and the valve be closed.
- By now you’ll have also disconnected your freshwater hose, drained it, and stored it away.
- Now, you can either inundate the entire water system with RV antifreeze or blast the water out of the lines with air. The latter is effective and less expensive. Never use automotive antifreeze. It’s toxic.
- Set your water heater bypass valve to “bypass,” or you’ll need a whole lot more antifreeze to unnecessarily fill the heater. Now you can either dump a couple of gallons of antifreeze in the freshwater tank, or you can buy and install a special plumbing connection that allows you to pump antifreeze directly out of the jug.
- Dump a gallon or two of the pink stuff in your previously drained freshwater tank and turn on the RV water pump. Open each water fixture and run it until the pink stuff flows out.
- Also, don’t forget the shower, toilet, and exterior shower. Start at the fixture closest to the pump and work out.
- If you’ve got a washing machine or an ice maker, follow the manufacturer’s instructions for winterizing these, too. Once you’ve got all the lines thoroughly “pinked up,” shut off the pump.

Be sure to dump both your gray and black water tanks. Photo courtesy of nodine, irv2.com member
Ensure a waterless RV during winter storage
We prefer skipping the antifreeze and don’t need a water heater bypass. Equip your “city water” inlet with a blowout plug that allows you to pump pressurized air into the water lines and blast the water out. Blowout plugs are another RV parts store item, or available on Amazon.com.
If you can set your air compressor pressure, set it for 40 pounds to keep from blasting your plumbing lines. Pressurize the line and open each fixture until all water is driven out of the line. Again, washer or icemaker owners, check the documentation.
Also, be sure to dump both your gray and black water tanks. Some RVers find this an advantageous time to use a tank-cleaning wand to clean out any of the more disagreeable memories of summer from the black water tank. Additionally, dump a few ounces of RV antifreeze down each of the drain traps, and leave a bit spilled in the toilet as well.

Also, make sure your tires are not resting on bare concrete or grass. Slip boards or plastic mats under your tires are ideal. Photo Courtesy ajlcal, irv2.com member
Don’t forget about these systems
- Make sure your batteries are fully charged before you “put up” for the winter. A discharged battery can freeze, expand, and break. A “smart” battery converter will keep the house batteries properly charged, but not overcharged. Older converters may allow batteries to overcharge—consider shutting the converter off. If you can’t keep them charged, store them (fully charged) in a warm place.
- Double-check the kitchen. Cereals, crackers, bread, and cookies may (and most likely) attract pests. Is the refrigerator thoroughly clean? Leave the doors propped open for free airflow. Unscrew any interior light bulbs.
- Inspect the roof of your rig, too. Ensure it isn’t damaged and the sealant is intact to keep out the weather.
Now is also a good time to change the oil in motorhomes and generators. There is no need to leave old oil with possibly corrosive properties floating around in the crankcase. This bit of preventative maintenance will help to keep you from becoming a crank.
If humidity is an issue where you live, a small dehumidifier helps. We use several dehumidifiers and left them around the rig and used a small fan running to keep air movement up. If you use the chemical type, make sure they won’t “overflow.”
Finally, speaking unofficially for the Southwest Tourism Bureau, remember, if you snowbird, all this will not be necessary! Check out these 3 Reasons Why You Should Head South With Snowbird RVers.

I live in Florida where it is close to 100 degrees in the summer. My trailer sits in my sunny driveway when not in use. Someone told me to run the air conditioner set at 90. I’m afraid of wearing out our air conditioner from it running on & off all the time. What should I be doing? Should I get a dehumidifier instead?
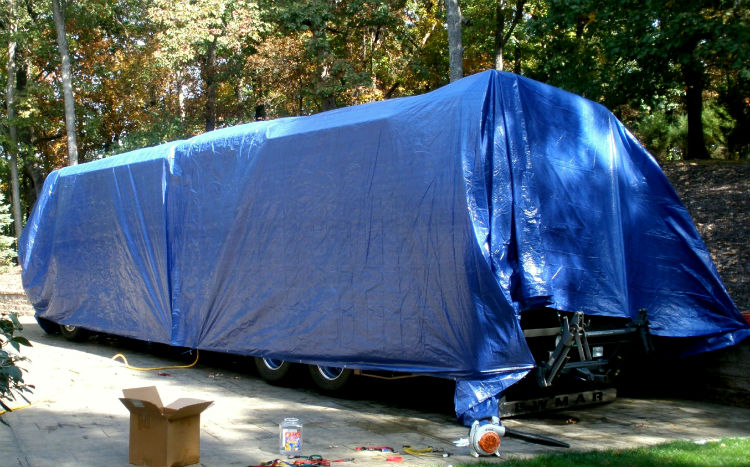
I’m surprised to see the RV wrapped up in a plastic tarp; you need you use something that is breathable to prevent mold, etc.
And do NOT dump a couple of gallons of antifreeze in the freshwater tank as suggested. Instead, get a kit that pumps the pink stuff into the lines if you live where it freezes.
What steps need to be taken to “winterize” a coach when winter temperatures go to 38-40 degrees?
I understand that antifreeze will not be needed, but what about mold in the tanks and lines? Could you add a few cups of bleach to the tanks?