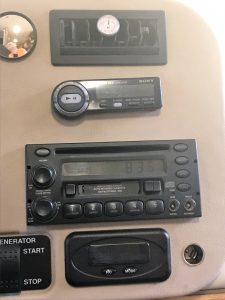
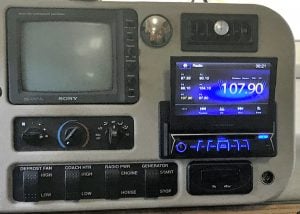
When we bought our new motorhome in 2003, it was supplied with what we thought was a great audio system. The Magnadyne M9900 AM/FM/CD/Cassette player was output to DHS Amplifier and featured a Sony 10-disc CD changer. Although the radio performed well, the grey and black LCD display on the M9900 was a major problem.
The display was barely visible during daylight, and unless you looked directly at the radio it was difficult to see what was being displayed. At one point, I bought a standalone LCD clock since I couldn’t quickly see the time on the radio display. Over time, this deficiency became less of a concern since we installed a hard-wired XMRadio. The tuner was simply dialed into 89.1 and forgotten about.
Over the years that we’ve owned this motorhome, we always wanted to upgrade the radio. One of the challenges that was holding us back was that a DIN and a half radio was no longer available, and we were therefore unable to fill the hole in our dash.
Newly welcomed into the iRV2 Community, Magnadyne Corporation was the original equipment supplier to Winnebago of our M9900 radio. According to their website, they offer a broad range of audio equipment for use in recreational vehicles.
As I was unsure about the size and connectivity that is needed in a 13-year-old Winnebago, I wrote to the company. I was relieved to find out that Magnadyne had a direct replacement product in the form of a single DIN radio that might just work.
Still concerned about the form factor, Magnadyne said not to worry, and that a new radio would fit using the M99XX 1.5DIN adapter kit.
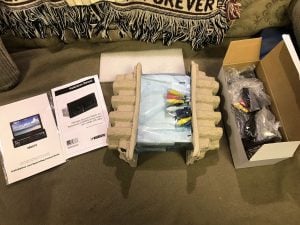
In a few days, the new radio that Magnadyne recommended, the M9970, had arrived. The radio was packaged with all manner of equipment, including a hand remote control, a specifically engineered plug-in wiring harness for our Winnebago, and a kit containing all the mounting adapters and wiring connectors.
Looking at the back of the M9970, you can see it has several RCA plugs, an antenna socket, a mic socket, and other short cable leads in a somewhat loose array, however, each wire is wrapped with a tag and legibly identified. What a big relief that was, especially for a do it yourself installer.
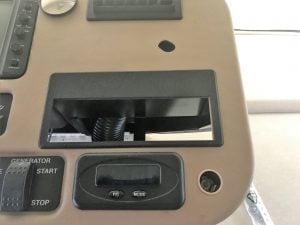
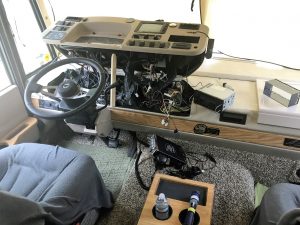
Getting the dash ready for the upgrade was a snap since I had removed the existing radio several times. Finishing up the prep work, the Sony 10CD changer control head was removed as obsolete.
Once the old radio was removed, I was left with an oversized hole and a small radio. This reality was a little nerve-racking at first, however, when I mounted the radio collar into the adapter plate and fit the assembly loosely into the dash, it appeared that it was going to work.
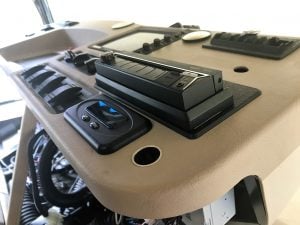
When the adapter plate and collar are in place, a screwdriver is used to bend several tabs tightly onto the back of the dash. The tabs essentially hold the radio solidly in place. Once the collar and adapter plate are secure, the radio is slid into the collar.
The new radio initially gave me concern since it was deeper than the original, however, all I had to do was bend a piece of metal out of the way and the M9970 bottomed out flush into the radio collar.
At this point, the project was beginning to take shape. The instructions showed an installer cutting and crimping wires, however, during my install I didn’t have to do any of that.
The provided Magnadyne custom wiring harness that came with the radio plugged into the Winnebago modular plug, and the other end of the of the harness plugged into a socket on the back of the radio.
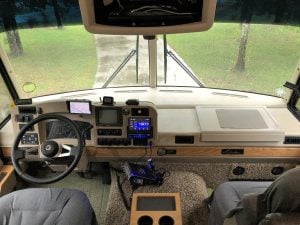
It was that easy. Once the radio was in place, a black collar is carefully but deliberately fitted around the nose of the radio, extending past the face of the dash. And that finished the install.
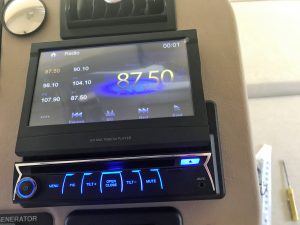
With the dash still raised, I turned the power on and the face of the radio came alive with blue highlights and lettering. I pushed a button that said Open/Close and out traveled a square looking panel which stopped and then tilted upwards. The letters DVD came up on the panel for a few seconds and then it went to a radio display mode.
I turned up the volume but all I heard was a loud hiss. Racking my brain for a few seconds, I realized that I had not plugged in the antenna wire. Plugging in the antenna and turning the power back on, I found myself listening to 107.9 FM in Bucksport, SC, an iHeart Radio Station. The first song I heard was a Keith Urban and Carrie Underwood number called “The Fighter”.
Right from the start, I turned up the volume and the sound was excellent without any appreciable distortion. The background on the display is dynamic and the foreground text is razor-sharp. The subwoofers were rocking like they hadn’t in a long time and a selfie would have paid witness to the big grin that was settling on my face.
When I was ready to finish and close the dash pod, I found that I had to reposition and nest the wires under the radio so there wouldn’t be any physical interference with the existing wiring, allowing the dash to fully lower to a closed position.
While I was listening to the sound coming from the Magnadyne M9970, I knew this was going to be one of the best audio electronic upgrades that I’ve accomplished since we owned our rig. I sat there studiously with my operator’s manual and learned how to set the date & time, set up the equalizer, and connected my iPhone.
During the install, I ran nearly 7 feet of wire up to the sun visor and clipped on a microphone using a large clip. My focus was to get the mic as distant as possible from the engine noise. Having completed the wiring, I confirmed that the effort was justified when the wife said that the phone was clear as a bell.
The bright screen supports full touch operation and is quickly compliant when using the right amount of pressure.
The radio has electronic touchpad controls that are easy to use. Most obvious is the push button, rotary knob for power On/Off, and volume control. A row of buttons provide selectable options for the Menu, Pic, Tilt+, Open Door, Tilt- and Mute.
To the right, a small rubber plugged door, when opened, accommodates a USB key allowing user pre-recorded music playlists. An AV input plug is provided, and when using an HDMI adapter, you can show pictures or movies right on the M9970’s HD display.
An eject button is provided to the right of the DVD/CD slot for discs. I could probably write another page about the remote control Magnadyne provided, however, Page 5 in the owner’s manual goes over all the functions. Although I have not tried the remote, it was reported that using the remote control is easier than using the touch screen and buttons on the radio.
The radio features an outstanding Graphic EQ with several presets, I like the “Optimal” setting. You can also infinitely adjust the balance and fade using a graphic interface and the touchscreen. There are 3 FM bands and 2 AM bands each with 6 user selected preset channels.
The M9970 will load and play a single DVD or CD at a time. The DVD and CD have several user selectable functions for Repeat, Shuffle, Selecting Audio Mode, Subtitle Language, Viewing Angle, and others further described in the owner’s manual.
Setting up your phone on the M9970 is basically the same as setting up the Bluetooth in your car. The process is called pairing. Using the Bluetooth setup on my phone and the M9970 was simple. Once both devices were communicating, the number 0000 was entered when prompted and just like that my phone was all set.
Quite a few of us already know how to use hands free-calling and there is little difference when using the M9970.
When you walk away from the rig with your phone, it automatically disconnects. When you come back to the cockpit, the phone will automatically pair up. If you are listening to a soundtrack, the phone takes over and mutes the music until your call is complete. The M9970 Bluetooth phone connection performs as well as the system in your car or truck.
Beginning on page 18, all of the radio settings are detailed, including the configurable custom calibrations and other modes explaining how to integrate audio and video input devices. The M9970 will also support an optional color back-up camera. The owner’s manual concludes with specifications, troubleshooting, and a wire connection table.
I would classify the M9970 as a Hi-Tech Low-Gadget radio, without many unwanted options while featuring more than enough technology to keep the average RV owner quite happy.
The M9970 Radio & M99XX adaptor plate were provided to this writer by Magnadyne, for the purposes of publishing this article. I hope you enjoyed it as much as I enjoyed the installation and the review. Thank you for reading.
Wondering, was it any problem to hook up the XM radio? What adaptor was used to do that? Also, what kind of antenna are you using for the radio and XM.
Great post that makes me want to do the same. Looks like the same radio in my 05 Itasca.
Regards,
Bill
wleib@cox.net
On the XMRadio side, it’s actually a NO brainer. A special adaptor, I believe called an injector, is directly connected from the XMRadio to the antenna wire. This makes for a direct connection and is not subject to fluctuations or being overpowered by a local station. For example you may select 88.5 on the XMRadio as the output channel and then tune the M9970 to 88.5 on FM1 as the monitored channel and you’ll have a 100% clear channel. The device is called a SiriusXM FMDA25 Direct Adapter.
In regard to the XMRadio, I use a standard roof mounted disc antenna.