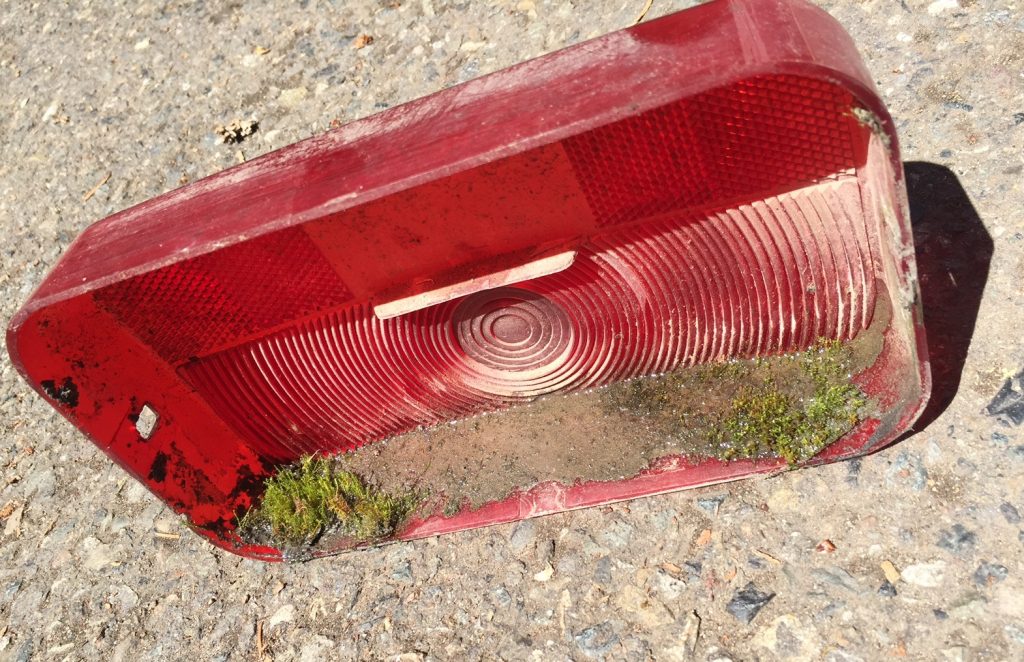
Moss growing inside our taillights. Photo by Dave Helgeson
Keep Moss From Growing In Your RV Brake Lights
Awhile back, I provided a tip on an easy way to check the operations of your brake lights. While recently checking the lights on my travel trailer via the method outlined, I discovered one side wasn’t working.
Popping the lens off, I discovered the inside of it had become a mini solarium hosting green plant life, compliments of the dust that had accumulated inside of it and the right amount of moisture, which probably entered the same way the dust must have.
Obviously, it was the right amount of soil, water, sunlight, and humidity, as moss or whatever it was seemed to be thriving despite the dry summer conditions.
Not surprisingly, the bulb and contact were a bit corroded, which I quickly corrected and had the brake light back in operation. Checking the other side revealed a similar greenhouse.
Rinsing out both tail light lenses had me ready to hit the road. However, I have since wondered what to do to prevent a repeat. Searching the internet, you will find suggestions from using a thin layer of Vaseline around the edge of the lens to prevent entry of dust and water to sealing it with silicone or using glass tape.
Taking the greenhouse with you in the brake lights, just another adventure in RVing!
Stay on top of your RV maintenance
Keep track of all your RV maintenance with an online tool such as RV LIFE Maintenance. Not only can you keep all your maintenance records and documents in one place, you’ll receive timely reminders via email when maintenance is due and potentially avoid a costly repair or serious accident.
Have you had a similar experience with your RV brake lights? Have you found a way to prevent a re-occurrence? If so, please share.

While I have yet to have this issue, I have used a product called Wet and Forget which is a great product to use around the home that is made for the prevention of moss growth. That does not take care of the dirt and water infiltration, just the growth. The infiltration issue might also be effected by a thin layer of the wrapping foam you get with some shipping packing. Cut into 1/2 inch strips, wrapped around the base and then popping the lens back on.
I just consider it one more item on my seasonal maintenance list. BTW, LED replacement bulbs and some aluminum foil glued to the black base as a reflector give a much brighter light output.
If you cannot make the lens seal properly, you can stop the moisture by simply drilling a 1/8″ hole in the bottom of the lens. The hole in the bottom acts as a drain hole. This trick even works on a sealed lens that has failed and allowed moisture in.
To clarify, the bottom in the lens pictured above with moss growing would be where the moss is growing.
Get some 3M Strip Calk, Part # 08578 – Walmart & most auto parts stores.
It comes in a box of 60 1 ft strips, maybe 1/8 inch in diameter. Malleable, like clay, doesn’t set hard.
I’d put a continuous strip along the top & sides of where the lens seats on the housing, pushed the lens on till it snaps in. Leave a bit of the bottom unsealed so any moisture that does enter can get out. Doesn’t set up, so you can get the lens off if the bulb needs replaced.
I always keep this stuff around; it’s about as useful as duct tape for emergency RV repairs…
If you have that much moisture inside your tail light, moss is not your issue. That moisture can lead to bigger electrical issues down the road.