Get Your RV Ready for Winter
Many travelers will use their RVs to travel to warmer areas during the winter, while others will prepare them for a few months in storage. If you find yourself in a situation where you need to winterize your RV, you’ve come to the right place! There are many different things you’ll need to do to help your camper endure the colder seasons, so let’s review our RV winterizing checklist.
The Essential RV Winterizing Checklist
Many of these steps will be quick fixes that can be completed within a few minutes or hours. However, make sure you give yourself enough time to properly prepare your RV for the off-season. Skipping or overlooking steps can lead to devastating consequences and long-term damage. Winter can be a difficult time for an RV, especially if it isn’t properly prepared for winter conditions.
1. Drain water supply
The most important step of winterizing an RV is draining the water supply. During the winter, RVs will be subjected to a wide range of temperatures. If they aren’t being regularly heated and used, the stagnant water that’s left behind can freeze and expand, which will lead to burst pipes, flooding, and other types of structural damage.
There are many to-do items on an RV winterizing checklist, but none of them will do you much good if you don’t address the water situation first. Luckily, it doesn’t take too long to empty the water reserves in most RV. You just need to make sure you’re being thorough.
Begin by draining your holding tanks
This includes everything in the freshwater tank, grey water tank, and black water tank. The freshwater tank can simply be emptied, but the other two will need to be flushed and cleaned.
Winter and early spring is a prime time for bacteria, mold, and other nasty things to build up, so give your RV a fresh start for the season. Use the tank flushing system if you have one. If not, you can use a cleaning wand and/or an RV holding tank cleaning product. Take the contaminated water to your nearest dump station so it can be safely processed.
Empty standing water in appliances
Just because your tanks are now empty doesn’t mean that your RV is completely drained. A small amount of water will linger in appliances like sinks, showers, toilets, ice makers, refrigerators, dishwashers, and washing machines.
Go around your RV and turn on all faucets (cold and hot). Flush toilets multiple times until they run dry. Empty out the water supply for your other appliances.
Use an air compressor to dry water lines
Even after everything has been drained there will still be a bit of moisture left in the pipes. This is why it’s a good idea to hook up an air compressor to your RV water lines.
This step isn’t a complete necessity on an RV winterizing checklist, but it never hurts to stay on the safe side when you’re dealing with water. Use 30-50 psi of compressed air to clear out any remaining moisture in your plumbing system. Once that is complete, replace the caps on the holding tanks and water lines.
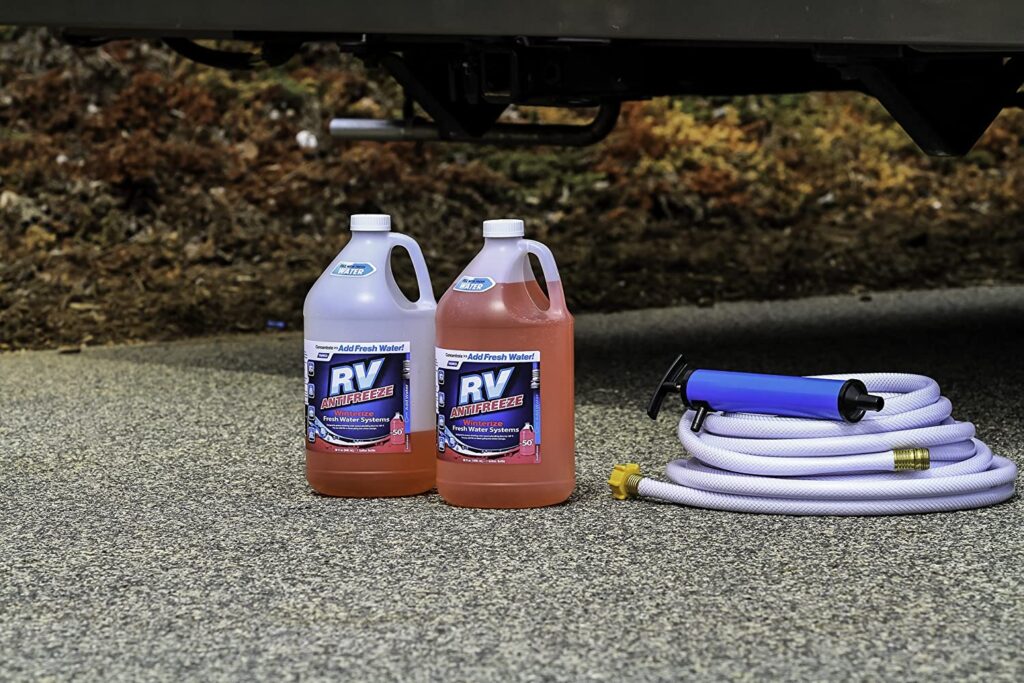
2. Use RV antifreeze
Next up, you’ll want to apply RV antifreeze to your plumbing system. This will prevent any warping over the winter when the RV is exposed to fluctuating temperatures.
Bypass water heater
The first thing you’ll want to do when adding antifreeze is bypass the water heater. If you don’t do this, the water heater will have to be completely filled with antifreeze before it will spread to the rest of the plumbing. You will end up wasting a ton of antifreeze (and money) if you don’t first bypass this system.
To do this, you’ll need a kit. Turn off the water heater, disconnect the cold and hot lines, and install the bypass kit according to the directions on the product. Reconnect the water lines and open the bypass, and you’re good to go!
Place RV water line in antifreeze container
Now it’s time to fill the RV plumbing system with antifreeze. Disconnect the RV water line (if you haven’t already done so), and place the end in a container of RV antifreeze (this will usually be a pink or green substance). Usually, you will need 2-3 gallons of antifreeze to winterize an RV, but you’ll need up to 10 gallons more if you aren’t able to bypass the water heater first.
Turn on freshwater pump
Activate the freshwater pump and allow antifreeze to travel through the plumbing system. Turn on the faucets throughout your camper until they start to run pink or green with antifreeze. Flush the toilet several times until the same thing happens. Pour 2-3 additional cups of antifreeze into each drain and toilet. Finally, you can turn off the pump and reconnect the RV water line to the freshwater tank.
Drain water heater
After everything on the RV winterizing checklist is done up to this point, you can return to the water heater. Remove the plug and drain its contents. This is usually done last so that nothing goes wrong with the draining and bypass installation.
3. Clean interior
Now that the vehicle is safe from water damage, it’s time to turn your attention to other aspects of winterizing. Clean out the RV and remove any extra cargo. This will help reduce weight and it will help you declutter. Make sure you don’t leave any food or temperature-sensitive items inside.

4. Protect against humidity
Major water damage can be avoided by following the steps above, but humidity can still be a pain in the neck. To prevent mold, mildew, or just unpleasant dampness, there are a few things you can do to reduce humidity levels.
Start off by wiping down and drying potentially moist areas of your RV. This includes the bathroom, kitchen, and windows. Add a few desiccants or drying agents in cupboards, windowsills, or secluded corners. Consider using an RV dehumidifier to help keep moisture out.
5. Remove battery
RV batteries are important pieces of equipment, and they need to be protected during the winter. To prevent any possible temperature damage, remove the battery and store it in a temperature-regulated area as long as the RV is sitting unused.
Basements, garages, closets, and crawlspaces are good options where your battery will be out of sight and out of mind. Wrap it in a few blankets to provide an extra layer of insulation.
6. Cover vents
Next item on the RV winterizing checklist: Protect the vehicle’s exterior! By this point, most of the interior issues have been addressed, so it’s time to turn our attention outward.
Begin by protecting all RV exterior vents. If these are left exposed, they provide entry points for snow, ice, humid air, and even infestations. Mice, bugs, and other pests might see your RV as a great place to spend the winter, so make sure they can’t get in. Place vent covers over every opening, and consider adding a layer of plastic wrapping for extra waterproofing.
7. Leave RV on blocks to distribute weight
RVs are sturdy vehicles, but they are still quite heavy. If the entire weight of the RV sits on the wheels for several months, this can cause structural issues and will shorten the lifespan of the tires. To prevent this, use RV blocks to distribute the weight as long as it is sitting unused.
8. Add RV skirting/covers
Now we’ve reached the final step on our RV winterizing checklist! Time to cover up the RV and let it rest until the next travel season rolls around. Install RV skirting around the base and tires to prevent snow and ice from getting underneath.
Add an RV cover that will provide protection against rain, snow, dirt, and wind. It’s easy to buy or make these protective coverings, and something is always better than nothing.
9. Consider storage options
If all of these steps feel like too much of a hassle, or you live in a particularly cold area, you may want to consider other storage options for the winter. For an extra cost, you can store your RV in a temperature-regulated facility.
You will still have to do some level of preparation, but it won’t be nearly as involved. These storage facilities can be quite expensive, but it may be worth the price to you if you want to let someone else take care of everything.
10. Track your RV maintenance
Make sure you keep track of all your RV maintenance and repairs with an online tool such as RV LIFE Maintenance. Not only can you keep all of your documents in one place, but you’ll also receive timely reminders when maintenance is due to help you avoid costly repairs and potentially serious accidents.
Related articles:
- How To Avoid Winter Camping Problems In Your RV
- Covered RV Storage vs Motorhome Covers: What’s Best?
- Is Your Rig Ready For Cold Winter Storage?

Great information on winterizing RV. Thank you for posting this for everyone.
Good job I liked all the details
You should mention that the antifreeze to be used should be a product specific for potable water systems and is not glycol based such as those used for automotive purposes.
Why would you use an air compressor to empty your water lines and then add antifreeze. If your lines are free of water they don’t need antifreeze. Seems redundant to me.
First I empty (drain) the hot water tank and turn the three valves required to isolate the tank. I then empty the black and gray tanks.
By blowing out the water lines (hot and cold) before adding RV antifreeze, you will pump less antifreeze into your system before the water/antifreeze mixture exiting the faucet spouts (shower and toilet) turns fully dark pink (near 100% antifreeze). While blowing out the water line never removes 100% of the potable water, I estimate the air removes 95+% of the water from the tubing/system. I initially, fill the RV antifreeze from the street connection using a hand pump and then the use the potable water pump to pump antifreeze through the tubing running from the pump to the nearest faucet. (And yes, my wife turns the faucet (shower and toilet) valves as I request as I fill the system. Again, I empty the black and gray water tanks. Finally, I add one pint (16 oz) of antifreeze to each drain with a trap and 1.5+ pint (24 oz) to the toilet in an attempt to protect the tank valve seats and seals from freeze damage.
Full disclosure: I live the Northern Vermont where we still have overnight low temperatures of -20 F or colder, so I attempt to achieve the lowest effective antifreeze temperature I can.
Tried to post this previously, but NEVER use the green anti-freeze in your RV. That’s for you engine and it poisonous. ONLY the pink stuff!
I’ve also never heard that you need to put your rig on blocks because sitting on the axles will cause structural issues over time. With some fivers using 10″ or 12″ I-beams there’s no structural issues from sitting still.
Dont forget to drain your low level water lines. As well, turn off electrical and gas to water heater BEFORE draining it.
What type of dehumidifier do you use inside camper for winter storage outside